Sunday, October 3, 2010

Sidewalk Sunday!!!

This Sidewalk Sunday is a little different than the rest.

Why you ask?

Well it's not because it's been like FOR-E-V-E-R since I've posted one.

No, it's because this Treasure was spotted by none other than the Lil' Man!


He's not only good looking, great at.... 


Knockin' fools out, and brave enough to...


pick up Snakes-

He's also great at....


finding Sidewalk Treasures!!!


 You see, this all started about 6 months ago. Lil' Man decided he wanted to buy himself an IPad.
So, he came to me and ask if he could help with making over the Treasures we gathered for some $$$.

I told him I loved that he was interested in helping but other than  prep work or cleaning up, there wasn't a lot he could do.

 Now Lil' Man, being the entrepreneur in training that he is, said "how about if I find furniture? Would you pay me?" I said "Sure, if you spot something on the sidewalk or at a garage sale and I can use it, I'll pay you a couple bucks" He sat and thought for a second and said "How much?" 

I said "I don't know, I guess it depends on what type of piece it is" 

He sat for a second longer and said...

"I don't want a flat fee- I'll take 10% of whatever it sells for"

All of the sudden Lil' Red chimed in  "Me too!"

And so began the next six months of interesting car rides with my children- each screaming "I SEE A (fill in the blank) IT'S MINE- I CALLED IT"

For one reason or another so far, it hadn't paid off for the kiddos.

That was until the other day when Lil' Man was on his way to school and he spotted the desk.

I can only imagine his friends face when he told him "Hang on- let me take a photo of this desk and send it to my Mom" HA!!!!!

So there I am, on my way to work when I get this text from the Lil' Man- "Mom, what about this? Is this a good piece?"

I smiled from ear to ear all the way to work. 

Now I just need to hurry up and sell it so I can pay the darn kid!!!

Here's a better look at the side of the desk....


Next up, this Sidewalk Special came to Treasures courtesy of Jenny.
Jenny has been my #1 furniture fan so far.
She's purchased more pieces from me than any other customer.
I just finished working on a bench for her outdoor seating area and arranged for Mr. Treasures to drop it off.
That's when I got a call that she was leaving me some stuff out front.
Thanks Jenny!!!
As usual, Mr. Treasures happily picked them up for me.


I've never seen an end table like this before.

Here's a look at the side...
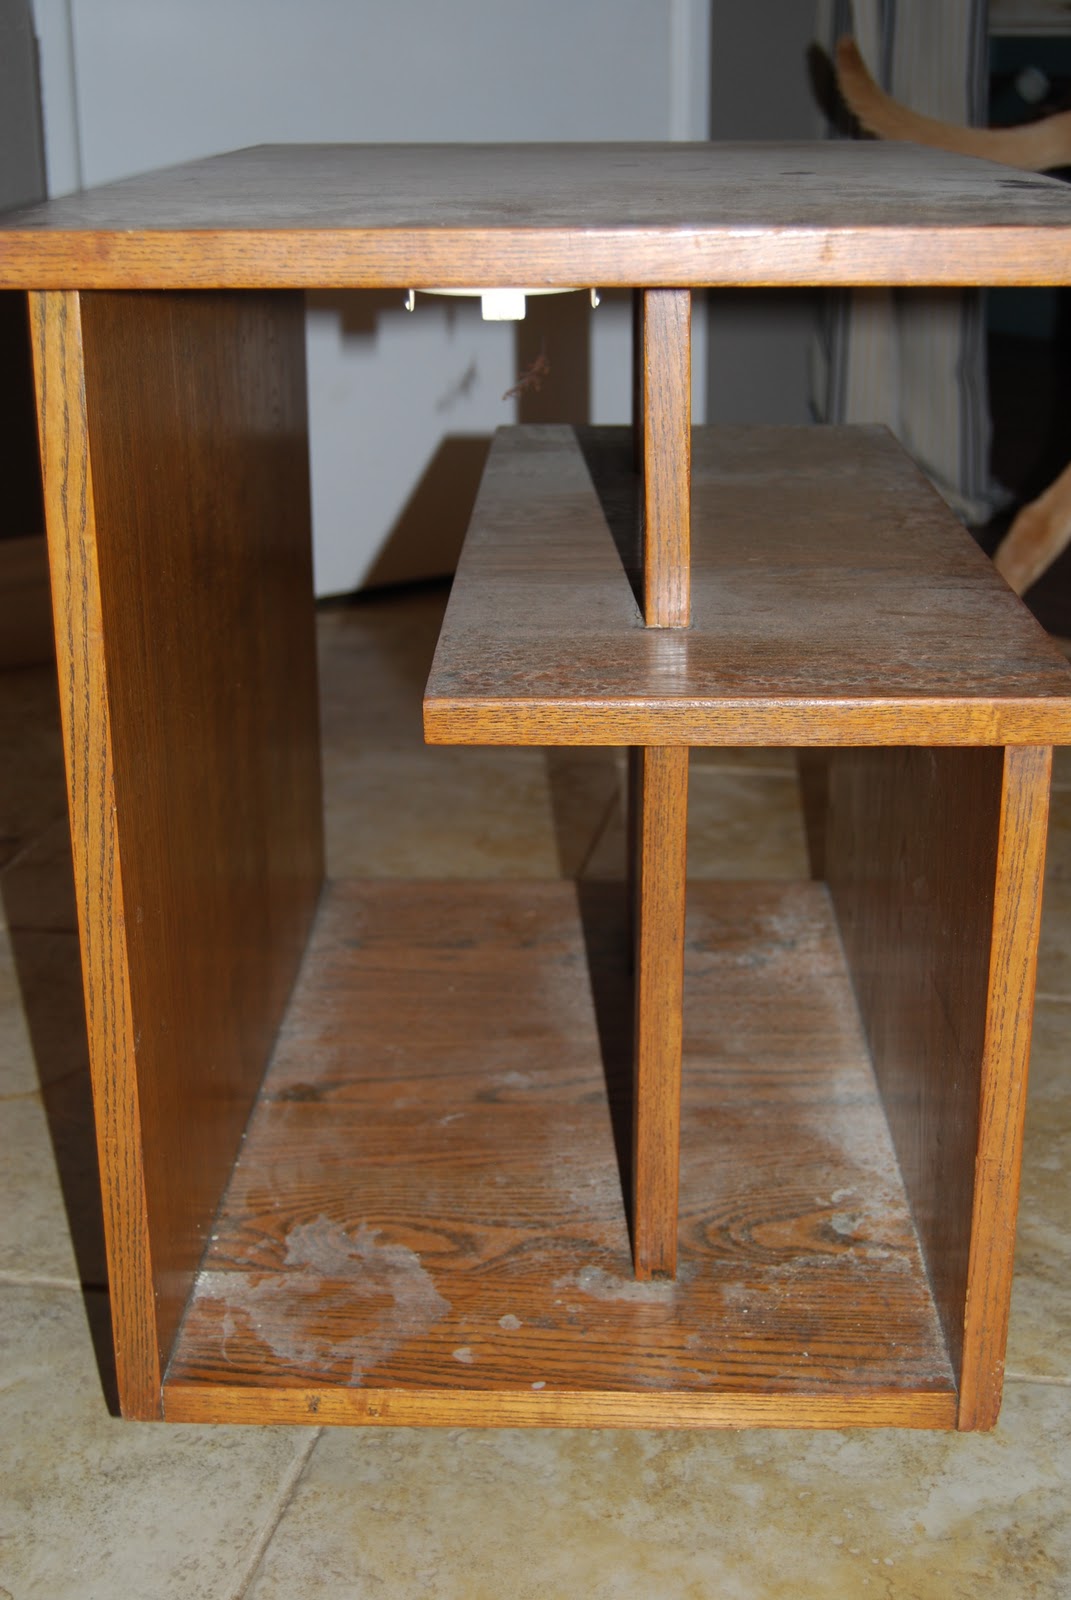


Any suggestions on what to paint it?


Angie

Thursday, September 30, 2010

It's Our Favorite Furniture Hacker!

You have NO idea how many times I tried to have this post!!?? First there was a problem with blogger, THEN there was a problem with me and THEN the power went out!!! 

Well, it's all better now cause finally-


Rayan from.....


Is here today to give us another step by step tutorial!!
(better late than never- right Rayan?)

This woman is A-mazing!
She really takes ALL the work out of figuring out how to be a Do it Yourself-er!

Check out this cool project she put together for us!

Mr. Treasures and I love to end the evening reading a book or watching a little t.v.
This would certainly come in handy!

Hi Everyone! Rayan from The Design Confidential here...Excited to be visiting with you today! I hope you enjoy this fun little project and perhaps even give it a go...


Plans for the bed can be found here, if you are interested in building that!


(don't ask what happened here- I have NO idea! stop by Rayan's to find the missing photo- HA!)
This project is really simple and can be modified for an even easier build if you don't have access to a miter saw or any saw for that matter.


2 1/2" Pocket Hole Screws (if you are a Kreg Jig Owner)

2 1/2" Screws

4 -2" Casters

Wood Glue

Wood Filler

Sandpaper

Finishing Supplies

Wood:

2 - 2x12 @ 8'


Tape Measure

Drill

Sander - optional - you can hand sand depending on the boards you choose.

Kreg Jig - optional - this allows you to hide your connections and form strong joints, however, traditional countersinking screws is always an option as well.

Saw - optional - you can have your local lumber supply cut your boards and skip the mitered corners.


1 - 2x12 @ 75"

2 - 2x12 @ 35"


Using a Pocket Hole System will provide the most professional appearance, however if you aren't using one, pre-drilling and countersinking is recommended.

Check for square after each step, and adhere to all safety standards.

This can be built without mitered corners, you would simply need to shorten the legs by 1 1/2" if you plan to keep it the same height.

Height is adjustable if you prefer more space between the bed and the table. Just be sure you account for this prior to cutting your boards.

Cut your boards to the appropriate length and miter the outside edges on both sides of the top and one side of the legs. Fasten using your Kreg Jig set to 1 1/2" stock or use 2 1/2" Screws from the top of the top down into the legs.


Attach casters to the legs, and fill screws holes, sand and finish as desired! Easy Peasy...and so convenient for reading, working on a laptop or breakfast in bed!


I hope you enjoyed this fun and fast little tutorial. Feel free to browse my other plans, hope to see you soon! Xx Rayan

Thank you so much Rayan!!!

Don't forget to  head over to The Design Confidential to see what else Rayan's been up to!

Sunday, September 26, 2010

What can I say...

What can I say?

Sometimes life gets in the way.

I haven't been a very good blogger lately.

Actually I haven't been a "very good" anything lately.
(currently working on correcting this)

I was hoping to post a fabulous Makeover Monday for you today but it's just not going to happen.
(insert sad face here)

Good news is Wednesday, The Design Confidential has a special guest post for us so make sure you stop back by for that!


In the meantime, bare with me- I'm still trying to work out some kinks in my personal life.


Angie